If desired, you can create a handwritten signature and convert it into an image to insert into your contribution details statements, tax receipts, and letters to non-givers. A handwritten signature adds a personal touch and gives your statements a custom look.
The following procedure shows you how to create a signature and save it to a file. After you save the image, you can add it to the Signature dropdown list in the report setup. When users set up reports and create letters to accompany statements and tax receipts, they can insert the image you create into their documents.
You can create as many signature image files as you need and save them to your local hard drive.
To create a signature image:
- Have the signer sign on a piece of white paper. We suggest that the signer use a gel pen or a marker-type pen, such as an Ultra Fine Sharpie, for the best results.
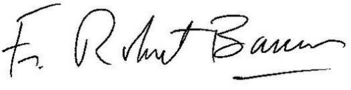
- For example:
- For example:
- Scan the signature into a file. For best results, select a high resolution setting (at least 300 dpi). Then, save the file on your computer.
- Open the image file in an image editing application.
- Complete the following:
- Crop out everything except the signature.
- For the best-looking image, make the background transparent.
- Resize the file to these dimensions: 264 by 48 pixels.
- Re-save the file on your computer as a .png, .bmp, or .gif.
- Record the exact location where you saved the file. You will need this information later when you add the signature image to your printed statements.
The file you created can now be added to printed statements, letters, and tax receipts.
Note: There are many excellent image-editing applications available online that you can download for free. No paper is pure white, so when scanned, the background may show up as a shade of gray rather than white. To avoid this problem, we recommend making the background transparent. In addition, an image on a transparent background also looks good on screen and on colored papers. The white background has been removed, and a checkered pattern appears in the transparent part of the image.
Updated